Niveau APPRENTISSAGE : ► Professionnel
Prérequis :
Matériel :
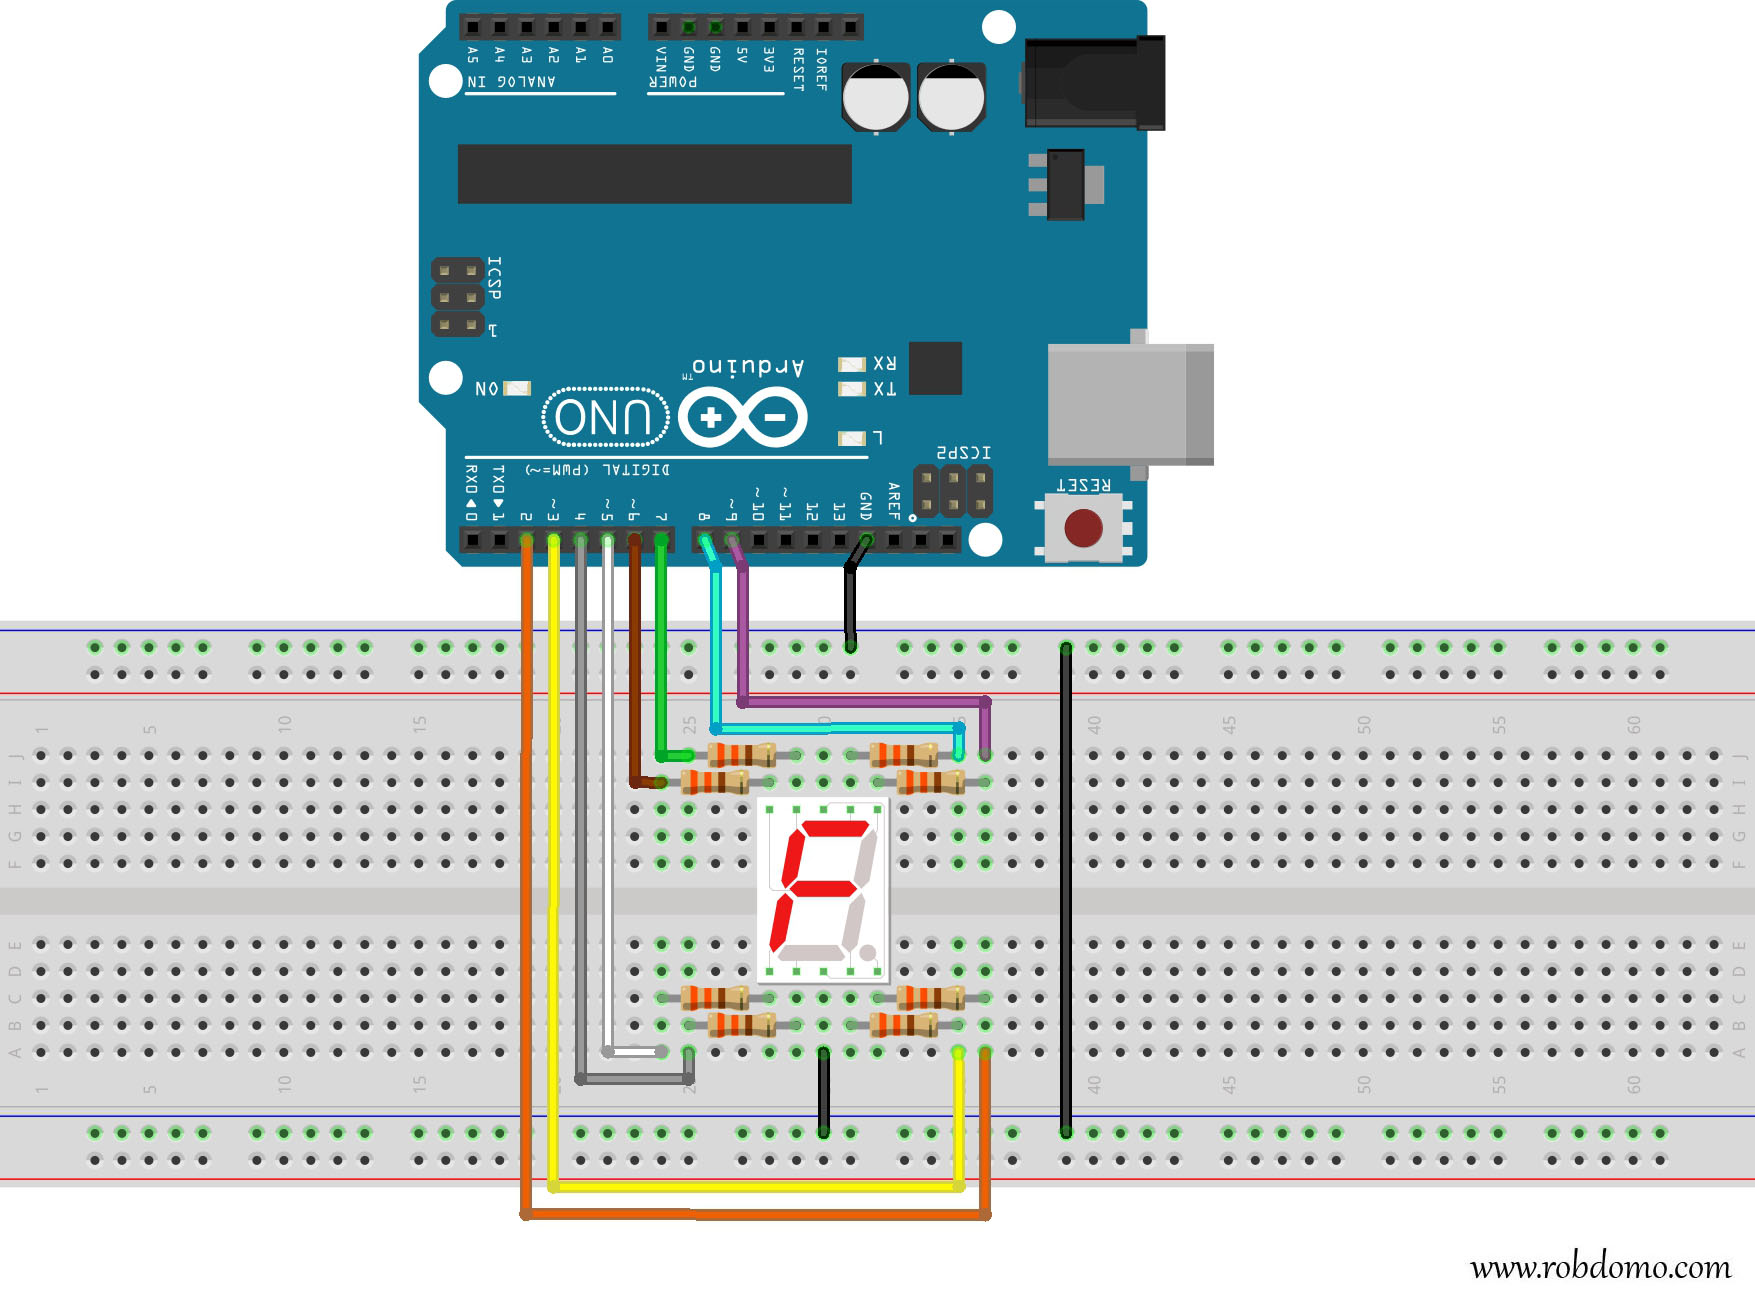
- 1 x Carte Arduino
- 1 x Afficheur 7 segments
- 8 x Résistance 330 Ω
- Fils de connexion
- 1 x Breadboard
Vidéo de démonstration :
Schéma de câblage :

Code :
const byte segments[11] = {
  B00111111, // 0
  B00000110, // 1
  B01011011, // 2
  B01001111, // 3
  B01100110, // 4
  B01101101, // 5
  B01111101, // 6
  B00000111, // 7
  B01111111, // 8
  B01101111, // 9
  B10000000, // .
};
const int brochesSegments[8] = {8, 9, 3, 4, 5, 7, 6, 2};

void setup() {
  for (int i = 0; i < 8; i++) {
    pinMode(brochesSegments[i], OUTPUT);
  }
}

void loop() {
  for (int i = 0; i <= 10; i++) {
    afficheSegment(segments[i]);
    delay(1000);
  }
}

void afficheSegment( byte octet) {
  boolean segmentAllumeOuEteint;
  for (int numeroSegment = 0; numeroSegment < 8; numeroSegment++) {
    segmentAllumeOuEteint = bitRead(octet, numeroSegment);
    digitalWrite( brochesSegments[numeroSegment], segmentAllumeOuEteint);
  }
}
+ Infos sur le langage utilisé :
1. Fonctions
2. Variables
3. Stucture
Nombre de vues: 748
J’aime ça :
J’aime chargement…